
Welcome to my ultimate guide for creating mouthwatering homemade scones! These British scones are more than just a pastry – they’re a delicious journey into traditional baking that transforms your kitchen into a cozy British tea room.
I’ve spent years perfecting this buttery scones recipe, learning the secrets that make these treats irresistibly light and flaky. Growing up with a passion for baking, I discovered that creating authentic British scones is simpler than most people imagine.
These homemade scones are not just a recipe – they’re a culinary experience that connects American home bakers with a beloved British tradition. Whether you’re preparing for afternoon tea or a weekend breakfast, this recipe will help you craft scones that are tender, rich, and absolutely delectable.
Get ready to learn how to make scones that will impress your family and friends with their incredible taste and texture. Let’s dive into the world of classic British baking!
Why I Love Making Traditional Scones at Home
My passion for traditional scones runs deep, rooted in cherished family memories and a love for British baking. Growing up, homemade scones were more than just a treat – they were a connection to our culinary heritage.
My Family’s Connection to British Baking
My grandmother introduced me to the art of making homemade scones when I was just a child. She brought her family’s recipes from England, teaching me that scone-making is about precision, love, and tradition. These memories sparked my lifelong appreciation for authentic baking.
Benefits of Homemade vs. Store-Bought Scones
Making homemade scones offers incredible advantages over store-bought versions:
- Complete control over ingredients
- Fresher taste and texture
- Cost-effective baking
- Ability to customize flavors
Perfect Occasions for Serving Scones
Scones are incredibly versatile for various serving occasions. Let me share some perfect moments to enjoy these delightful treats:
| Occasion | Scone Style |
|---|---|
| Afternoon Tea | Classic Plain or Raisin |
| Weekend Brunch | Savory Cheese Scones |
| Holiday Gathering | Festive Cranberry Scones |
| Casual Breakfast | Blueberry Scones |
Whether you’re hosting a formal tea or enjoying a quiet morning, traditional scones can elevate any dining experience. They’re not just a pastry – they’re a celebration of flavor and tradition.
Essential Ingredients for Perfect Scones Recipe
Creating delicious scones starts with selecting the right scone ingredients. As a passionate baker, I’ve learned that each component plays a crucial role in achieving that perfect, melt-in-your-mouth texture we all love.
Let’s dive into the key ingredients that make scones truly spectacular:
- Flour: The best flour for scones is typically all-purpose flour or pastry flour. King Arthur Flour works wonderfully, providing the ideal protein content for tender scones.
- Butter: Choosing the right butter for scones is critical. I always recommend using cold, unsalted butter cut into small cubes to create those signature flaky layers.
- Liquid: Heavy cream or buttermilk adds richness and helps bind the ingredients
- Leavening agents: Baking powder gives scones their signature rise
Understanding the quality of each ingredient can transform your baking from ordinary to extraordinary. Let me break down the most important components in more detail.
| Ingredient | Purpose | Recommended Type |
|---|---|---|
| Flour | Provides structure | All-purpose or pastry flour |
| Butter | Creates flaky texture | Cold, unsalted butter |
| Sugar | Adds sweetness | Granulated white sugar |
| Baking Powder | Helps scones rise | Fresh, active baking powder |
Pro tip: Always use the freshest ingredients possible. Room temperature ingredients blend more easily, but keep your butter cold to ensure those perfect, flaky layers that make scones irresistible.
Kitchen Tools and Equipment You’ll Need
Preparing delicious scones requires the right kitchen equipment for scones. I’ve learned through years of baking that having the proper scone baking tools can make all the difference in creating perfect, flaky treats. Let me walk you through the essential gear you’ll want in your kitchen.
Must-Have Baking Tools
When it comes to measuring ingredients accurately, you’ll need a few key items:
- Accurate digital kitchen scale
- Measuring cups (both dry and liquid)
- Measuring spoons
- Large mixing bowl
- Pastry blender or fork
- Baking sheet
- Parchment paper
Optional but Helpful Equipment
While not absolutely necessary, these tools can elevate your scone-making experience:
- Bench scraper
- Silicone baking mat
- Pastry brush
- Cooling rack
- Kitchen thermometer
Measuring Tips for Best Results
Precision is key when measuring ingredients for scones. I recommend using a digital scale for the most accurate measurements. Flour can be particularly tricky – always spoon it into your measuring cup and level it off with a straight edge. Avoid scooping directly with the measuring cup, as this can compress the flour and lead to dense, heavy scones.
Step-by-Step Scones Recipe Instructions
Mastering the art of how to make scones is easier than you might think. I’ll walk you through the scone recipe steps that will transform your baking skills and help you create delicious homemade treats.
Before starting your scone baking instructions, gather all your ingredients and tools. Room temperature ingredients are key to achieving the perfect texture.
- Mix dry ingredients in a large bowl
- Combine flour, sugar, baking powder
- Add a pinch of salt
- Cut cold butter into small cubes
- Use a pastry cutter or your fingers
- Work quickly to keep butter cold
- Create a well in the center of dry ingredients
- Add wet ingredients
- Gently mix until just combined
- Shape the dough
- Pat into a circular shape
- Cut into triangular wedges
- Bake until golden brown
- Preheat oven to 425°F
- Bake for 12-15 minutes
My scone recipe steps guarantee a light, flaky texture that will impress family and friends. The key is handling the dough minimally and keeping everything cold during the process.
| Mixing Stage | Key Technique | Time Estimate |
|---|---|---|
| Dry Ingredients | Sift and combine | 3-4 minutes |
| Butter Incorporation | Cold, quick cutting | 2-3 minutes |
| Liquid Addition | Gentle mixing | 1-2 minutes |
| Shaping | Minimal handling | 3-4 minutes |
With these detailed scone baking instructions, you’ll create bakery-worthy scones right in your own kitchen. Practice makes perfect, so don’t get discouraged if your first batch isn’t flawless!
Tips for Achieving Light and Flaky Texture
Creating flaky scones is an art that requires precision and care. The secret to perfect scones lies in understanding the delicate balance of ingredients and technique. I’ll share my top insights for achieving that coveted light and tender texture that makes scones truly special.
Mastering scone texture is all about careful dough handling and understanding the science behind baking. Successful scone makers know that every step counts when creating these delightful pastries.
Common Mistakes to Avoid
- Overmixing the dough, which develops gluten and creates tough scones
- Using warm ingredients that melt the butter too quickly
- Kneading the dough excessively
- Rolling the dough too thin or too thick
Temperature Control Secrets
Temperature plays a crucial role in creating flaky scones. I always recommend using cold ingredients and keeping everything as cool as possible during preparation.
| Ingredient | Ideal Temperature | Reason |
|---|---|---|
| Butter | Very cold | Creates steam pockets for flakiness |
| Milk/Cream | Refrigerator cold | Prevents premature butter melting |
| Dough | Chilled | Maintains butter’s solid state |
Handling the Dough Properly
Scone dough handling is an art form that requires a gentle touch. I use these key techniques to ensure light and flaky results:
- Use a light hand when mixing ingredients
- Pat the dough gently instead of rolling
- Cut straight down with a sharp knife or cutter
- Avoid twisting when cutting scone shapes
By following these scone texture tips, you’ll be well on your way to creating bakery-worthy flaky scones that will impress everyone at your table.
Delicious Variations and Serving Suggestions
Exploring scone variations is an exciting culinary adventure that transforms the classic recipe into something uniquely personal. I love experimenting with different scone flavors that range from sweet to savory. Blueberry lavender scones bring a delightful floral note, while cheddar jalapeño options offer a spicy kick that’s perfect for brunch.
When considering serving scones, traditional accompaniments like clotted cream and strawberry jam remain my top recommendation. For a modern twist, I suggest creating a spread bar with multiple flavored butters and preserves. Fresh lemon curd, honey butter, and homemade marmalade can elevate the scone experience and provide guests with delightful customization options.
My favorite scone variations include mix-ins like dark chocolate chips, dried cranberries, or toasted pecans. Savory scones work wonderfully with herbs like rosemary or thyme, making them an excellent side for soups or salads. The key is balancing flavors and maintaining the classic tender, flaky texture that makes scones so irresistible.
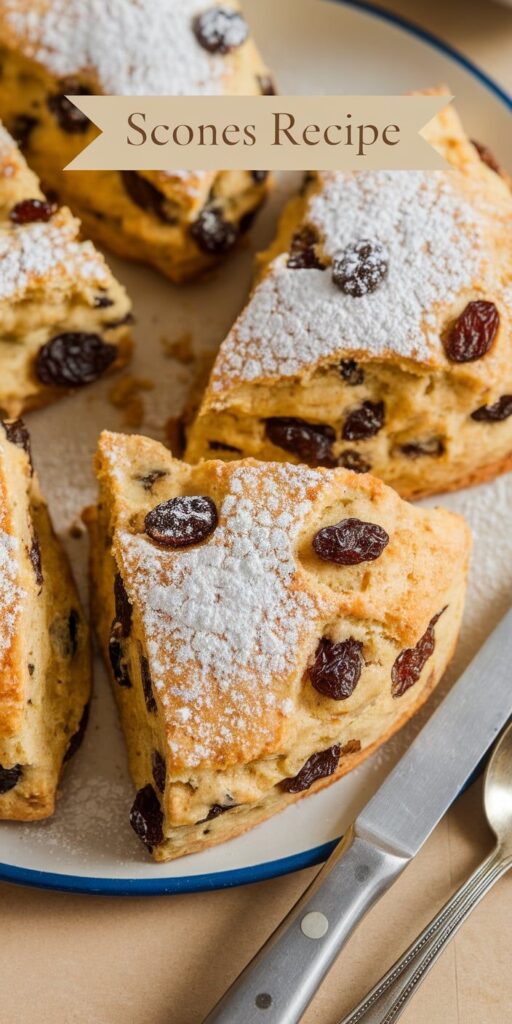
For those wanting to impress, consider garnishing your scones with a light glaze or dusting of powdered sugar. Whether you’re serving them for afternoon tea or a weekend breakfast, these versatile pastries are sure to delight everyone at the table.