
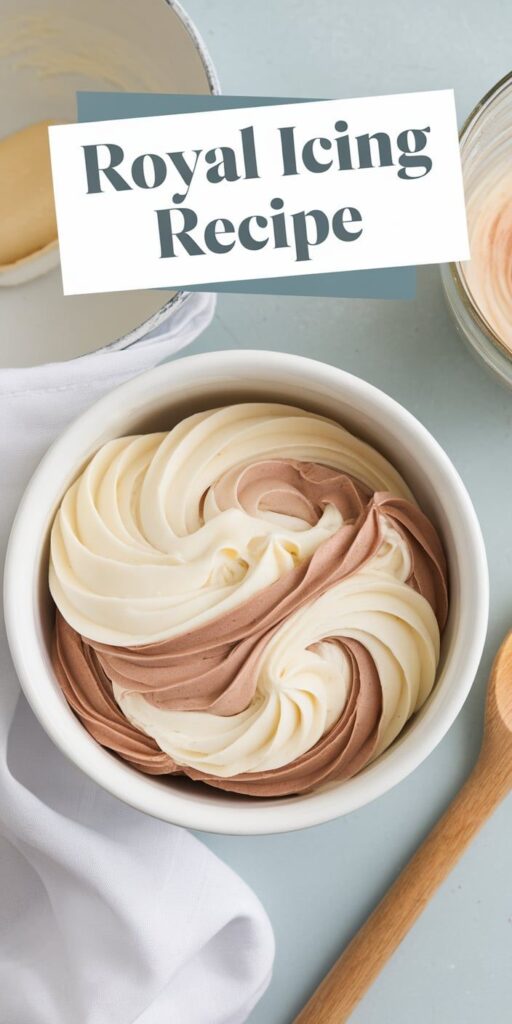
Welcome to the world of royal icing recipe magic! As a passionate baker, I’ve discovered that royal icing is the secret weapon for creating stunning, professional-looking cookies. This versatile frosting transforms ordinary sugar cookies into edible works of art that will impress family and friends.
My journey with cookie decorating began years ago, and royal icing quickly became my go-to technique for creating intricate designs. Whether you’re a beginner or an experienced baker, mastering this royal icing recipe will take your cookie decorating skills to the next level.
In this comprehensive guide, I’ll share everything you need to know about creating the perfect royal icing. From understanding its unique properties to learning professional decorating techniques, you’ll gain the confidence to create beautiful, professional-looking cookies that look like they came straight from a bakery.
Get ready to dive into the delicious world of royal icing and cookie decorating! I’ll break down each step to ensure your success, sharing tips and tricks I’ve learned through years of baking experience.
What Makes Royal Icing Special for Cookie Decorating
Royal icing stands out as a magical medium in professional baking, transforming simple cookies into edible works of art. Its unique properties make it a go-to choice for bakers who want to create stunning, intricate designs that truly wow their audience.
The royal icing texture is what sets it apart from other decorative frostings. Unlike typical buttercream or glazes, royal icing dries to a smooth, hard finish that allows for incredible precision in cookie decorating.
The Science of Royal Icing’s Remarkable Texture
Understanding the royal icing texture requires diving into its basic chemistry. The combination of powdered sugar and egg whites or meringue powder creates a unique molecular structure that:
- Hardens quickly when exposed to air
- Maintains sharp, crisp decorative lines
- Provides a smooth, glossy finish
Why Professional Bakers Love Royal Icing
In professional baking, royal icing offers unparalleled versatility. I’ve used it for countless projects beyond cookie decorating, appreciating its ability to create intricate details and lasting designs.
Diverse Uses for Royal Icing
Royal icing uses extend far beyond simple cookie decoration. Pastry chefs and bakers leverage this versatile medium for:
- Elaborate cake decorations
- Gingerbread house construction
- Sugar sculpture details
- Delicate wedding cake embellishments
Whether you’re a home baker or aspiring professional, mastering royal icing can elevate your baking skills to new artistic heights.
Essential Ingredients for the Best Royal Icing Recipe
Creating perfect royal icing starts with understanding the right royal icing ingredients. My years of baking have taught me that precision matters when selecting each component. The foundation of any great royal icing recipe relies on a careful balance of key elements.
- Confectioners’ sugar (powdered sugar)
- Meringue powder
- Water
- Optional flavoring extracts
Meringue powder is a game-changer for royal icing. It provides stability and helps create that smooth, glossy finish professional bakers love. Unlike traditional recipes using raw egg whites, meringue powder offers a safer alternative that ensures consistent results every time.
When selecting confectioners’ sugar, look for a fine, smooth variety without any lumps. Sifting the sugar before mixing helps prevent clumps and creates a silky-smooth texture. I recommend using pure cane powdered sugar for the best consistency.
For those with dietary restrictions, here are some ingredient alternatives:
- Vegan meringue powder substitutes
- Corn-free powdered sugar options
- Organic sugar alternatives
The secret to amazing royal icing is understanding how these ingredients work together. Each component plays a crucial role in creating that perfect, pipeable consistency that makes decorated cookies truly spectacular.
Kitchen Tools You’ll Need for Royal Icing Success
Creating stunning royal icing designs requires the right set of royal icing tools and cookie decorating equipment. I’ll walk you through the essential tools that will transform your baking experience and help you craft professional-looking cookies.
Mixing Equipment Essentials
When preparing royal icing, having the right mixing tools can make all the difference. I recommend investing in:
- Stand mixer with paddle attachment
- Hand mixer with whisk attachments
- Large mixing bowls in various sizes
- Measuring cups and spoons
- Rubber spatulas for scraping edges
Decorating Tools and Storage Supplies
Professional cookie decorating equipment goes beyond basic mixing tools. To create intricate designs, you’ll want to have these items in your kitchen:
- Piping bags (disposable and reusable)
- Decorating tips in multiple sizes
- Squeeze bottles for flooding
- Toothpicks for detailing
- Offset spatula for smooth surfaces
Safety and Hygiene Tools
Maintaining a clean workspace is crucial when working with royal icing. Stock up on these essential hygiene tools:
- Food-safe gloves
- Sanitizing spray
- Paper towels
- Airtight storage containers
- Cooling racks
My Foolproof Royal Icing Recipe
Creating a perfect homemade royal icing doesn’t have to be complicated. I’ve developed an easy royal icing recipe that will transform your cookie decorating game. This simple method ensures you’ll get professional-looking results every single time.
Let’s dive into the ingredients you’ll need for this delightful homemade royal icing:
- 4 cups powdered sugar (sifted)
- 3 tablespoons meringue powder
- 9-10 tablespoons warm water
- 1/2 teaspoon clear vanilla extract (optional)
The key to an incredible easy royal icing recipe is precise measurement and technique. I’ll walk you through my tried-and-true method:
- Sift the powdered sugar into a clean mixing bowl
- Add meringue powder and mix dry ingredients
- Slowly add warm water while mixing on low speed
- Increase mixer speed to medium-high for 5-7 minutes
- Stop when icing forms stiff, glossy peaks
Pro tip: The consistency is crucial for successful cookie decorating. Start with less water and add gradually to achieve your desired thickness.
| Consistency Type | Water Amount | Best Use |
|---|---|---|
| Stiff | Less water | Piping borders |
| Medium | Moderate water | Details and writing |
| Flood | More water | Filling cookie surfaces |
With this easy royal icing recipe, you’ll create stunning decorated cookies that look like they came straight from a professional bakery!
How to Achieve the Perfect Royal Icing Consistency
Mastering royal icing consistency is crucial for creating stunning decorated cookies. The right consistency can make or break your design, whether you’re flooding large areas or creating delicate piping details.
Royal icing consistency varies depending on your decorating goal. Professional bakers know that texture is everything when working with this versatile decorating medium.
Flooding Icing Techniques
For flooding icing, you’ll want a smooth, liquid-like consistency that spreads easily. Here are my top tips:
- Test flooding consistency by dropping a line of icing into the bowl – it should disappear within 5-10 seconds
- Use a squeeze bottle for even application
- Aim for a consistency similar to corn syrup
Piping Icing Guidelines
Piping icing requires a thicker texture that holds its shape. Check your royal icing consistency with these methods:
- The consistency should be similar to toothpaste
- When you lift your mixer paddle, the icing should form a soft peak
- Use a spatula to test – it should hold a defined line
Troubleshooting Consistency Problems
If your royal icing isn’t quite right, don’t panic. Small adjustments can save your batch:
- Too thick? Add water by teaspoon
- Too thin? Mix in powdered sugar gradually
- Always mix slowly to prevent air bubbles
Practice makes perfect when working with royal icing consistency. Each batch might require slight tweaks, so don’t get discouraged!
Coloring and Flavoring Your Royal Icing
Transforming plain royal icing into a vibrant and delicious decorating medium is an art form. Coloring royal icing requires careful technique to maintain the perfect consistency while creating stunning visual effects. I’ll share my top tips for achieving beautiful, professional-looking results.
When it comes to coloring royal icing, gel food coloring is my go-to choice. These concentrated colors provide intense pigmentation without thinning the icing’s texture. Start with a tiny amount and gradually add more to reach your desired shade. Pro tip: Always mix colors in a separate bowl to prevent accidentally ruining a large batch of icing.
- Gel food coloring produces the most vibrant colors
- Use toothpicks to add small amounts of color gradually
- Mix colors in small separate containers
- Wear gloves to prevent staining your hands
Flavored royal icing can elevate your cookie decorating game. While traditional vanilla works perfectly, I love experimenting with unique flavor extracts. Almond, lemon, and peppermint are excellent options that complement various cookie recipes. When adding flavors, use high-quality pure extracts and add them sparingly to maintain the icing’s ideal consistency.
Creating a custom color palette requires planning and creativity. I recommend selecting 3-4 complementary colors that work well together. Consider the occasion or theme of your cookies when choosing your color scheme. Pastel colors work great for spring events, while bold jewel tones can make holiday cookies pop.
- Choose complementary colors
- Consider the theme of your cookies
- Use color wheel principles for guidance
- Test colors on a small batch first
Remember that practice makes perfect when coloring and flavoring royal icing. Don’t be afraid to experiment and develop your unique style!
Storage Tips and Shelf Life
Storing royal icing correctly can make a huge difference in maintaining its quality and extending its royal icing shelf life. I’ve learned through years of baking that proper storage is key to keeping your beautiful icing fresh and ready for decorating.
When it comes to storing royal icing, you’ll want to follow a few critical guidelines to preserve its texture and usability. The right storage method can keep your icing fresh for several days or even weeks.
Choosing the Right Storage Containers
Select airtight containers that will prevent your royal icing from drying out. I recommend using:
- Glass containers with tight-fitting lids
- Plastic containers with secure seals
- Piping bags with twist-tie closures
Temperature and Environment Management
Temperature plays a crucial role in maintaining royal icing’s quality. Here’s a quick guide to storing your icing:
| Storage Location | Expected Shelf Life | Recommended Conditions |
|---|---|---|
| Refrigerator | Up to 2 weeks | Covered, in airtight container |
| Room Temperature | 24-48 hours | Away from direct sunlight |
| Freezer | Up to 1 month | Sealed in freezer-safe container |
Pro tip: Always press plastic wrap directly onto the surface of the royal icing before sealing the container. This prevents a hard crust from forming and helps maintain its smooth consistency.
Common Royal Icing Mistakes and How to Fix Them
Royal icing troubleshooting can be tricky, even for experienced bakers. I’ve learned through years of decorating cookies that some mistakes are more common than others. Air bubbles often plague home bakers, creating unsightly bumps in your beautiful icing design. To prevent this, I recommend gently tapping your piping bag and using a toothpick to pop any visible bubbles before the icing sets.
Color bleeding is another challenge when working with royal icing. Dark colors can sometimes seep into lighter shades, ruining your carefully planned design. My go-to solution for fixing icing mistakes is to let each color layer dry completely before adding another. Use a food dehydrator or fan to speed up the drying process, and always work with completely dry base layers.
Consistency issues can make or break your royal icing technique. If your icing is too thick, it won’t spread smoothly; too thin, and it will run right off the cookie. I’ve found that adjusting the liquid (water or milk) in small increments helps achieve the perfect flooding consistency. Keep a spray bottle of water nearby to make quick adjustments during your decorating process.
Sometimes royal icing simply won’t dry properly, which can be incredibly frustrating. This often happens due to high humidity or incorrect sugar-to-liquid ratio. I always check my kitchen’s humidity and use a dehumidifier when working on intricate cookie designs. Remember that practice makes perfect in royal icing troubleshooting, and each mistake is an opportunity to improve your skills.