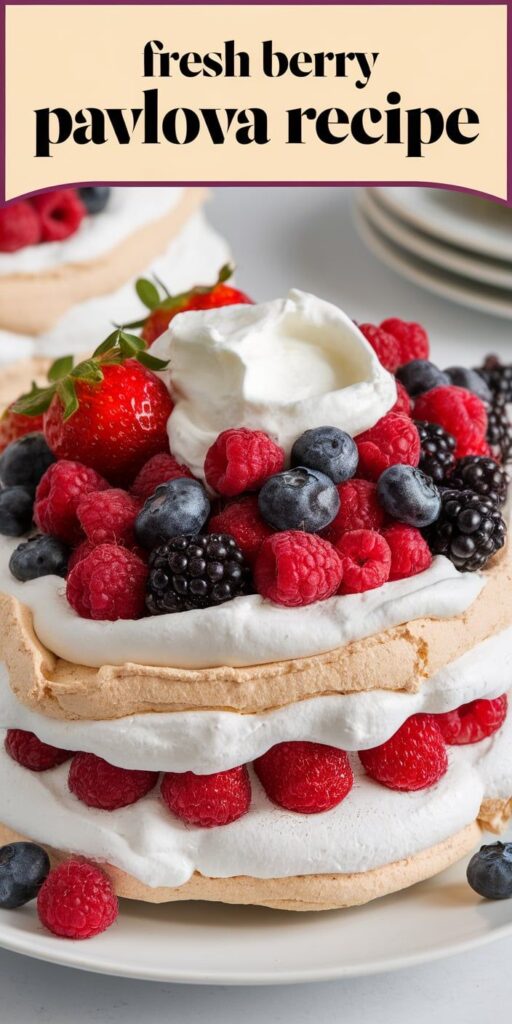
If you’re searching for a stunning dessert that combines elegant presentation with irresistible flavor, the fresh berry pavlova is your ultimate culinary solution. This homemade pavlova transforms simple ingredients into a breathtaking meringue dessert that will impress any gathering.
Originating from Australia and New Zealand, the pavlova has become a global sensation. Its delicate meringue base provides a crisp exterior with a marshmallow-like center, crowned with luscious whipped cream and vibrant fresh berries. What makes this dessert truly special is its perfect balance of textures and flavors.
Creating a fresh berry pavlova might seem intimidating, but with the right technique, anyone can master this show-stopping dessert. Whether you’re hosting a summer party or preparing a romantic dinner, this meringue dessert guarantees a memorable finale to your meal.
My passion for baking has taught me that precision and patience are key to achieving the perfect pavlova. In the following sections, I’ll guide you through every step of creating this delightful treat, sharing professional tips and techniques that will elevate your dessert-making skills.
What Makes a Perfect Pavlova
Creating a perfect pavlova is an art that requires precision and understanding of key baking principles. The magic of a crispy meringue lies in the delicate balance of technique and ingredients. I’ll share the insider secrets to crafting a pavlova that will impress even the most discerning dessert lovers.
The Science Behind Crispy Meringue
A perfect pavlova demands attention to detail. The crispy meringue exterior depends on several critical factors:
- Precise sugar-to-egg white ratio
- Careful beating technique
- Controlled oven temperature
Choosing the Right Egg Whites
Egg white tips are crucial for achieving that signature pavlova texture. I recommend using:
- Fresh, room-temperature eggs
- Completely clean, grease-free mixing bowl
- Absolutely separated egg whites
Temperature Control Tips
| Stage | Recommended Temperature | Purpose |
|---|---|---|
| Egg Whites | Room Temperature (68-70°F) | Maximum volume and stability |
| Oven | 250°F (low and slow) | Crisp exterior, marshmallow interior |
| Cooling | Oven off, door cracked | Prevent cracking and moisture |
Mastering these techniques will help you create a stunning pavlova with a perfectly crispy meringue that melts in your mouth. Practice and patience are your best tools in achieving dessert perfection.
Essential Ingredients for Fresh Berry Pavlova
Creating the perfect pavlova starts with selecting the right pavlova ingredients. The magic of this delightful dessert lies in its precise component selection and careful preparation.
For the meringue base, you’ll need high-quality ingredients that ensure a crisp exterior and soft interior. My recommended pavlova ingredients include:
- Large egg whites (room temperature)
- Superfine white sugar
- Cornstarch
- White vinegar or cream of tartar
- Vanilla extract
The fresh berries for pavlova play a crucial role in both flavor and presentation. I recommend a vibrant mix of seasonal berries such as:
- Strawberries
- Raspberries
- Blueberries
- Blackberries
For the whipped cream topping, gather these ingredients:
- Heavy whipping cream
- Powdered sugar
- Vanilla extract
| Ingredient Category | Key Components | Quality Tip |
|---|---|---|
| Meringue Base | Egg whites, sugar | Use fresh, room temperature eggs |
| Fresh Berries | Mixed seasonal berries | Choose ripe, vibrant berries |
| Cream Topping | Heavy cream, sugar | Whip to soft peak stage |
Selecting premium ingredients ensures your fresh berry pavlova will be a showstopping dessert that delights both eyes and taste buds.
Kitchen Tools and Equipment Needed
Creating a stunning pavlova requires the right pavlova baking tools and meringue equipment. I’ll guide you through the essential kitchen gear that will help you craft a show-stopping dessert with confidence and ease.
Mixing and Baking Equipment
When preparing pavlova, specific meringue equipment can make all the difference in your baking success. Here are the key tools you’ll need:
- Stand mixer or electric hand mixer with whisk attachment
- Large glass or metal mixing bowl (avoid plastic)
- Clean, dry baking sheet
- Parchment paper or silicone baking mat
- Piping bags and large star tip (optional for decorative edges)
- Offset spatula for smoothing meringue
- Digital kitchen scale for precise measurements
Serving and Presentation Tools
Elevate your pavlova’s final presentation with these specialized serving tools:
- Flat cake stand or decorative serving platter
- Large flat spatula for transferring the meringue
- Sharp serrated knife for cutting
- Pastry brush for decorating
- Decorative cream dispensing tools
Pro tip: While professional-grade pavlova baking tools can enhance your experience, many home bakers create stunning desserts with basic kitchen equipment. The key is understanding technique and having clean, dry tools ready for your meringue preparation.
Fresh Berry Pavlova Recipe
Creating the perfect fresh berry pavlova recipe requires precision and care. I’ll walk you through a homemade pavlova instructions that will wow your guests with its delicate meringue and vibrant berries.
Ingredients you’ll need for this delightful dessert:
- 4 large egg whites (room temperature)
- 1 cup granulated sugar
- 1 teaspoon vanilla extract
- 1 teaspoon white vinegar
- 2 teaspoons cornstarch
For the berry topping, gather:
- 2 cups mixed fresh berries (strawberries, raspberries, blueberries)
- 1 cup heavy whipping cream
- 2 tablespoons powdered sugar
My homemade pavlova instructions begin with carefully separating egg whites. Ensure no yolk contaminates the whites, as this will prevent proper meringue formation. Beat the egg whites until soft peaks form, gradually adding sugar while continuing to whip.
The key to a stunning fresh berry pavlova recipe is achieving a glossy, stiff meringue. Fold in vanilla, vinegar, and cornstarch gently to maintain the air bubbles. Spread the meringue on a parchment-lined baking sheet, creating a circular shape with slightly raised edges.
Bake at 250°F for approximately 90 minutes. The meringue should be crisp outside and marshmallow-like inside. Allow complete cooling before adding whipped cream and fresh berries just before serving.
Step-by-Step Meringue Preparation
Creating the perfect pavlova requires precision and skill in meringue preparation. I’ll walk you through the essential techniques to craft a stunning dessert that will impress your guests.
Whipping Techniques for Perfect Meringue
Meringue preparation starts with selecting the right equipment. I recommend using a clean, dry stand mixer with a spotless metal or glass bowl. Egg whites whip best at room temperature, so remove them from the refrigerator about 30 minutes before starting.
- Use room temperature egg whites
- Ensure bowl is completely grease-free
- Start whipping at low speed
- Gradually increase speed
- Add sugar slowly to stabilize meringue
Mastering Pavlova Shaping
Pavlova shaping is an art that requires gentle handling. I suggest using a piping bag or carefully spreading the meringue with a spatula to create a circular base with slightly raised edges.
| Shaping Method | Difficulty Level | Best For |
|---|---|---|
| Piping Bag | Advanced | Precise circular shape |
| Spatula Spreading | Beginner | Rustic, free-form design |
Baking Pavlova to Perfection
Baking pavlova requires patience and precise temperature control. I recommend baking at a low temperature of 250°F (120°C) for approximately 90 minutes. The goal is to dry out the meringue without browning it.
- Preheat oven to 250°F
- Place meringue on parchment paper
- Bake for 90 minutes
- Turn off oven and let pavlova cool inside
- Do not open oven door during baking
Whipped Cream and Berry Topping Guide
Creating the perfect pavlova toppings is an art that transforms this classic dessert from good to absolutely spectacular. The key to an incredible pavlova lies in its cloud-like whipped cream and vibrant fresh berries.
When preparing whipped cream for pavlova, I recommend using heavy whipping cream chilled to perfection. Start with cold cream and a clean, cool mixing bowl to achieve the most stable peaks. The ideal whipped cream should be light yet sturdy enough to hold its shape on top of the delicate meringue.
- Use cold heavy cream straight from the refrigerator
- Add a touch of vanilla extract for enhanced flavor
- Whip until medium-stiff peaks form
- Avoid over-beating, which can make cream grainy
For berry toppings, I suggest a colorful mix of seasonal berries. Strawberries, raspberries, and blueberries create a stunning visual and flavor combination. Gently wash and pat dry your berries, then slice larger fruits like strawberries to ensure even distribution across the pavlova.
Pro tip: For an extra touch of elegance, consider adding a light dusting of powdered sugar or a drizzle of fruit coulis over your whipped cream and berries. This will elevate your pavlova from delightful to absolutely divine.
Make-Ahead and Storage Tips
Creating a make-ahead pavlova requires strategic planning to maintain its delicate texture and freshness. Storing pavlova components separately can help preserve the dessert’s signature crisp exterior and soft interior. I’ll share my top tips for preparing and preserving this delightful dessert.
Preparing your pavlova in advance doesn’t mean compromising on quality. The key is understanding how to store each component correctly:
- Meringue base can be stored at room temperature for up to 2 days
- Keep the base in an airtight container away from humidity
- Separate whipped cream and berries until just before serving
Proper Storage Methods
For successful make-ahead pavlova, follow these storage guidelines carefully:
| Pavlova Component | Storage Method | Maximum Storage Time |
|---|---|---|
| Meringue Base | Cool, dry place in sealed container | 2-3 days |
| Whipped Cream | Refrigerated in sealed container | 24 hours |
| Fresh Berries | Refrigerated, unwashed | 2-3 days |
Shelf Life Guidelines
When storing pavlova, remember that moisture is the enemy of a crisp meringue. I recommend assembling the dessert no more than 2-3 hours before serving to maintain the perfect texture. Refrigeration can make the meringue soft, so it’s best to keep components separate until the last moment.
- Never freeze a fully assembled pavlova
- Meringue base can be frozen for up to 1 month
- Thaw frozen meringue at room temperature
By following these make-ahead pavlova storage tips, you’ll ensure a stunning dessert that looks and tastes freshly prepared.
Serving Suggestions and Presentation Ideas
When it comes to pavlova presentation, I’ve discovered that visual appeal matters just as much as taste. A beautifully plated dessert can transform an ordinary meal into an extraordinary experience. For an elegant look, I recommend serving individual pavlovas on white porcelain plates with carefully arranged fresh berries scattered around the meringue base.
Serving pavlova can be versatile for different occasions. At a summer brunch, I love creating a rustic family-style presentation where guests can help themselves. For more formal dinner parties, I suggest precise plating techniques: use a sharp pastry knife to create clean cuts and garnish with mint leaves or edible flowers for a sophisticated touch.
Consider complementing your pavlova with unexpected flavor enhancers. A drizzle of dark chocolate sauce, a sprinkle of toasted almonds, or a light dusting of powdered sugar can elevate the dessert’s visual and taste profile. Each seasonal variation brings a unique opportunity to reimagine this classic dessert, making it perfect for everything from casual gatherings to upscale events.
Pro tip: Always assemble your pavlova just before serving to maintain the perfect crisp exterior and soft interior. Prepare components in advance, but combine them moments before your guests are ready to enjoy this stunning dessert.