
Summer gatherings and backyard barbecues aren’t complete without a delicious coleslaw recipe. My classic creamy coleslaw has been a family favorite for years, offering a perfect blend of crisp vegetables and tangy dressing that everyone loves.
This homemade coleslaw is more than just a side dish – it’s a culinary tradition that brings people together. With just a few simple ingredients and minimal preparation time, you can create a restaurant-quality salad right in your own kitchen.
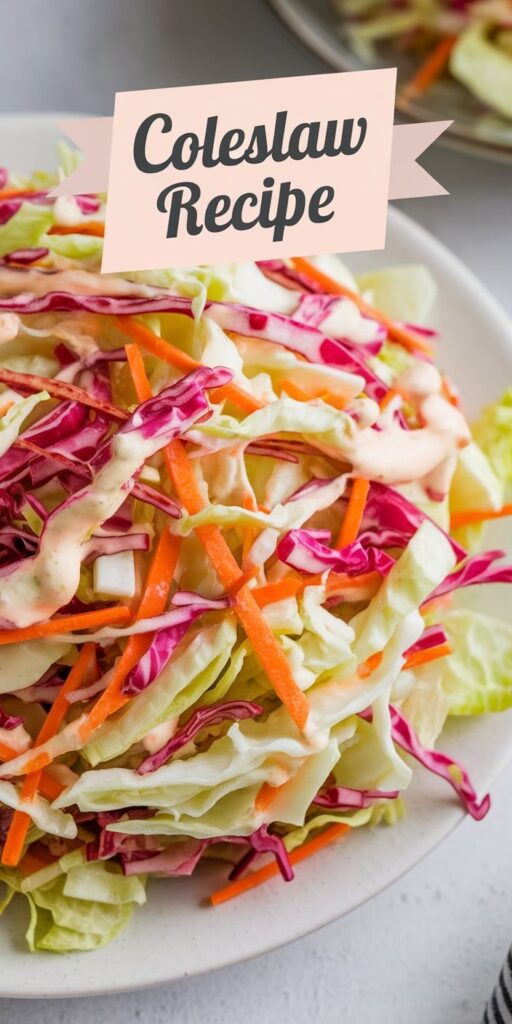
My creamy coleslaw recipe is incredibly versatile. It pairs perfectly with grilled meats, sandwiches, and picnic spreads. The combination of shredded cabbage, carrots, and a rich, creamy dressing creates a refreshing and satisfying dish that will impress your family and friends.
Whether you’re a cooking novice or a seasoned chef, this coleslaw recipe is guaranteed to become a staple in your meal rotation. Get ready to discover how easy and delicious homemade coleslaw can be!
Why I Love Making Homemade Coleslaw
Coleslaw has been a cherished part of my family’s culinary tradition for generations. My grandmother’s handwritten recipe card, stained with decades of love and kitchen memories, sparked my passion for creating this delightful side dish. The homemade coleslaw benefits go far beyond just great taste.
My Family’s Traditional Recipe Heritage
Growing up, our family gatherings always featured my grandmother’s special coleslaw. Her family recipe was more than just a dish – it was a connection to our roots. Each crisp bite told a story of summers spent together, sharing meals and creating lasting memories.
Health Benefits of Fresh Coleslaw
Fresh coleslaw packs a serious nutritional punch. The key ingredients offer remarkable health advantages:
- Cabbage provides essential vitamins and fiber
- Carrots deliver beta-carotene for eye health
- Low-calorie option for weight-conscious eaters
- Boosts immune system with raw vegetable nutrients
Best Occasions to Serve This Dish
My coleslaw serving suggestions span various events. This versatile side dish shines at:
- Summer barbecues
- Picnic gatherings
- Holiday potlucks
- Weeknight family dinners
- Outdoor sporting events
Whether you’re hosting a backyard cookout or looking for a quick, nutritious side, this homemade coleslaw recipe has you covered. It’s more than food – it’s a celebration of flavor and family tradition.
Essential Ingredients for the Perfect Coleslaw Recipe
Creating the best coleslaw recipe starts with selecting fresh, high-quality ingredients. I’ve learned that the key to an outstanding coleslaw lies in choosing the right mix of vegetables and crafting a delicious dressing that brings everything together.
For the base of your fresh coleslaw, you’ll want to focus on these core coleslaw ingredients:
- Green cabbage (shredded fine)
- Purple cabbage (for color variation)
- Carrots (julienned or grated)
- Red onion (thinly sliced)
The dressing is what truly elevates a good coleslaw to a great one. I recommend these essential dressing components:
- Mayonnaise (full-fat for creamy texture)
- Apple cider vinegar
- Granulated sugar
- Dijon mustard
- Celery seeds
| Ingredient | Quantity | Purpose |
|---|---|---|
| Green Cabbage | 4 cups | Primary crunchy base |
| Carrots | 1 cup | Added sweetness and color |
| Mayonnaise | 3/4 cup | Creamy binding agent |
| Apple Cider Vinegar | 2 tablespoons | Tangy flavor balance |
Pro tip: Always use the freshest vegetables you can find. Crisp cabbage and bright carrots make a world of difference in your coleslaw’s texture and flavor.
Kitchen Tools and Equipment You’ll Need
Preparing the perfect coleslaw requires the right coleslaw preparation tools. I’ve discovered that having the proper equipment can transform your kitchen experience and make slicing cabbage for coleslaw a breeze.
When it comes to creating delicious coleslaw, selecting the right tools can make all the difference. I’ll share my favorite kitchen gadgets that simplify the preparation process.
Essential Slicing Tools
Slicing cabbage for coleslaw can be accomplished through several methods:
- Sharp chef’s knife for traditional hand-cutting
- Mandoline slicer for uniform, thin cuts
- Food processor with slicing attachment
- Box grater for quick shredding
Smart Storage Solutions
Proper coleslaw storage is crucial for maintaining freshness and flavor. I recommend investing in airtight containers that keep your coleslaw crisp and delicious.
- Glass containers with sealed lids
- Plastic containers with snap-tight closures
- Stainless steel containers with tight seals
Time-Saving Kitchen Gadgets
To streamline your coleslaw preparation, consider these efficient tools:
- Electric food processor
- Adjustable mandoline with multiple blade settings
- Quick-lock vegetable chopper
- Salad spinner for washing and drying vegetables
By investing in these coleslaw preparation tools, you’ll make your kitchen experience more enjoyable and efficient. Remember, the right equipment can turn a simple recipe into a culinary masterpiece!
Secret Tips for Making Restaurant-Style Coleslaw
Crafting the perfect restaurant-style coleslaw requires more than just chopping vegetables. I’ve learned some game-changing coleslaw tips that transform an ordinary side dish into a culinary masterpiece.
The secret to exceptional restaurant-style coleslaw starts with vegetable preparation. I recommend using a sharp mandoline slicer to create uniform, thin cuts that ensure even flavor distribution. Shredding cabbage and carrots into delicate, consistent strips mimics professional kitchen techniques.
- Salt vegetables 15 minutes before mixing to draw out excess moisture
- Drain and pat vegetables completely dry for crisp texture
- Chill ingredients before combining for maximum freshness
Dressing is where the best coleslaw techniques truly shine. I’ve discovered that whisking mayonnaise with apple cider vinegar creates a tangy base that elevates the entire dish. A touch of sugar balances the acidity, while celery seeds add unexpected depth.
Professional chefs know that letting coleslaw rest in the refrigerator for 1-2 hours before serving allows flavors to meld beautifully. This simple step transforms your homemade creation into a restaurant-quality side dish that will impress family and friends.
Step-by-Step Preparation Instructions
Creating the perfect coleslaw requires careful attention to detail. My coleslaw preparation steps will help you transform simple ingredients into a delicious side dish that everyone will love. Let me walk you through the process of how to make coleslaw that’s both fresh and flavorful.
Vegetable Preparation Guide
Preparing vegetables is crucial for an excellent coleslaw. Start by selecting fresh, crisp cabbage and carrots. Here’s my recommended approach:
- Wash vegetables thoroughly under cold water
- Remove outer cabbage leaves
- Use a sharp knife or mandoline for uniform slicing
- Shred cabbage into thin, consistent strips
- Grate carrots using a box grater or food processor
Dressing Mixing Technique
The coleslaw dressing recipe is the heart of this dish. I’ll share my secret to creating a creamy, tangy dressing that elevates the entire salad:
- Combine mayonnaise, apple cider vinegar, and sugar
- Whisk ingredients until smooth
- Add a pinch of salt and black pepper
- Mix thoroughly to ensure even distribution
Proper Seasoning Balance
Achieving the right seasoning balance makes all the difference in coleslaw. My technique ensures a perfect blend of flavors:
| Ingredient | Quantity | Purpose |
|---|---|---|
| Salt | 1/2 teaspoon | Enhances overall flavor |
| Black Pepper | 1/4 teaspoon | Adds subtle heat |
| Sugar | 1 tablespoon | Balances tanginess |
Taste and adjust seasonings gradually. Remember, you can always add more, but you can’t take away!
Storage Guidelines and Make-Ahead Tips
When it comes to coleslaw storage, I’ve learned a few tricks to keep my dish fresh and delicious. Storing your homemade coleslaw properly can help maintain its crisp texture and vibrant flavor. I recommend using an airtight container and placing it in the refrigerator, where it typically lasts 3-5 days.
Make-ahead coleslaw is a game-changer for busy home cooks. I suggest preparing the vegetable mix and dressing separately until just before serving. This strategy prevents the cabbage from becoming soggy and keeps your coleslaw looking and tasting fresh. If you notice the slaw getting watery, simply drain excess liquid and give it a quick stir before serving.
Understanding how long does coleslaw last is crucial for food safety and quality. For the best results, I always prepare my coleslaw no more than 24 hours before a gathering. Pro tip: if you’re making it ahead, keep the dressing on the side and mix it in just before serving to preserve that perfect crunch and prevent wilting.
Refrigeration is key to maintaining your coleslaw’s texture and flavor. Always store it in the coldest part of your refrigerator, and avoid leaving it at room temperature for more than two hours. With these simple storage guidelines, you’ll enjoy a crisp, delicious side dish every time.