
Summer brings the most delightful opportunities for baking, and my favorite seasonal treat is the rustic rhubarb galette. This homemade galette captures the essence of fresh, vibrant flavors in a beautifully imperfect pastry that celebrates simplicity and taste.
A summer pastry like this rhubarb galette transforms ordinary ingredients into an extraordinary dessert. The free-form nature of the galette allows home bakers to create a stunning dish without the precision of traditional pie-making. With just a few simple ingredients, you can craft a dessert that looks professionally prepared yet maintains a charming, rustic appeal.
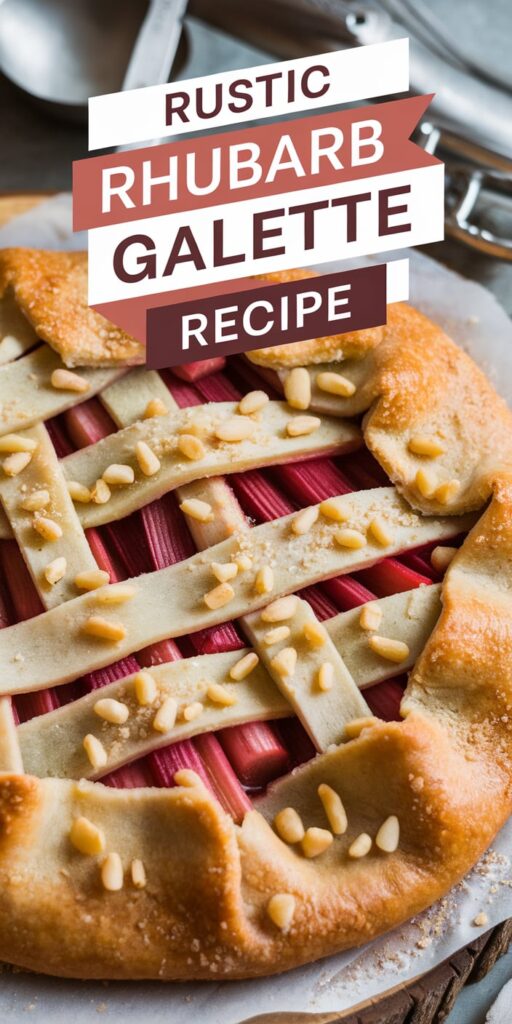
My recipe focuses on showcasing the tangy rhubarb within a buttery, flaky crust that crumbles perfectly with each bite. The beauty of this rustic rhubarb galette lies in its simplicity – no fancy techniques required, just fresh ingredients and a love for baking.
Whether you’re an experienced baker or a kitchen novice, this homemade galette promises a delicious adventure that captures the true spirit of summer baking.
What Makes a Rhubarb Galette Different from Traditional Pies
Diving into the world of rhubarb desserts reveals a delightful alternative to classic pie: the rustic galette. This free-form pastry offers a unique approach to baking that sets it apart from traditional pie-making techniques. Let me walk you through the charming characteristics that make galettes a standout choice for dessert lovers.
The French Origins of Galettes
Originating in the French countryside, galettes represent a more relaxed approach to pastry. Unlike structured pies, these free-form pastries embrace imperfection. My favorite aspect of galette vs pie is the rustic elegance that comes from its deliberately casual preparation. The French culinary tradition celebrates simplicity, allowing home bakers to create stunning desserts without precise crimping or complicated techniques.
Benefits of Free-Form Pastry
- Easier preparation with minimal equipment
- No need for special pie dishes or precise crimping
- Showcases filling with an open, rustic design
- Faster baking time compared to traditional pies
Why Rhubarb Works Perfectly in Galettes
Rhubarb desserts find their ideal match in galettes. The tart vegetable thrives in the open-style pastry, allowing its natural juices to caramelize beautifully around the edges. I’ve found that the free-form structure lets the rhubarb’s vibrant flavor shine through, creating a more intense taste experience than a traditional enclosed pie.
| Characteristic | Galette | Traditional Pie |
|---|---|---|
| Crust Style | Rustic, folded edges | Structured, crimped edges |
| Preparation Difficulty | Easy, forgiving | Precise, technical |
| Baking Technique | Open-style, direct caramelization | Enclosed, steamed filling |
Whether you’re a baking novice or a seasoned pro, a rhubarb galette offers a delightful and approachable dessert that captures the essence of homemade comfort with a touch of French elegance.
Essential Ingredients for Your Rustic Rhubarb Galette Recipe
Creating a perfect rhubarb galette starts with selecting the right ingredients. I’ll guide you through choosing the best components to craft a delightful dessert that captures the essence of spring’s favorite tart fruit.
Selecting and Preparing Fresh Rhubarb
When picking fresh rhubarb, look for firm, bright red or deep pink stalks that feel crisp to the touch. Avoid limp or bruised stalks. Here are my top tips for preparing your rhubarb:
- Wash stalks thoroughly under cool water
- Trim off leaf tops and bottom ends
- Cut into uniform 1/2-inch pieces for even cooking
- Pat dry with paper towels to remove excess moisture
Crafting the Perfect Buttery Galette Crust
A buttery galette crust requires precision and quality ingredients. I recommend using cold butter and minimal handling to create a flaky, tender pastry. Your key ingredients include:
- All-purpose flour
- Unsalted cold butter
- Ice water
- A pinch of salt
- Optional: one egg for egg wash
Balancing Sweet and Tart Rhubarb Seasonings
The magic of a rhubarb galette lies in its perfect balance of flavors. Rhubarb seasonings play a crucial role in transforming the tart fruit into a harmonious dessert. I suggest combining:
- Granulated sugar
- Brown sugar for depth
- Ground cinnamon
- Fresh orange zest
- A splash of vanilla extract
Step-by-Step Baking Instructions
Creating a delicious rhubarb galette might seem intimidating, but I’ll walk you through my foolproof galette baking instructions that make this rustic dessert simple to prepare. These step-by-step rhubarb galette recipe guidelines will help you craft a stunning pastry that looks professional yet tastes homemade.
- Prepare the dough by mixing cold butter, flour, and salt until crumbly
- Chill the dough for at least one hour to ensure flakiness
- Roll out the chilled dough into a large, thin circle on parchment paper
- Slice rhubarb into thin, uniform pieces for even cooking
- Mix rhubarb with sugar, cornstarch, and optional spices like cinnamon
When learning how to make rhubarb galette, the key is in the assembly. Spread the rhubarb mixture in the center of your rolled-out dough, leaving a 2-inch border. Gently fold the edges over the filling, creating beautiful pleats that showcase the rustic nature of this French-inspired dessert.
Before baking, brush the exposed dough with an egg wash to achieve a gorgeous golden-brown color. Bake at 375°F for 35-40 minutes, or until the crust turns crisp and the rhubarb becomes tender and bubbling.
- Pro tip: Let the galette cool for 15 minutes before serving
- Serve warm with a scoop of vanilla ice cream
- Store leftovers in the refrigerator for up to 3 days
Tips for Achieving the Perfect Golden-Brown Crust
Creating a stunning rhubarb galette requires mastering a few key techniques that transform an ordinary dessert into a professional-quality masterpiece. I’ll share my top secrets for achieving that irresistible golden-brown galette crust that will impress both family and friends.
Mastering Temperature Control
The secret to a perfect golden-brown galette crust starts with temperature management. I always recommend keeping your ingredients ice-cold, especially the butter for your pastry. Cold butter creates those delightful flaky layers that make a galette crust truly exceptional.
- Chill butter for at least 30 minutes before mixing
- Use ice-cold water when preparing the dough
- Rest the dough in the refrigerator for 1 hour before rolling
Egg Wash for Pastry Perfection
The egg wash is crucial for achieving that beautiful golden-brown galette crust. I use a simple mixture of beaten egg and a splash of milk or cream. Brush this carefully over the exposed pastry edges to create a stunning, glossy finish.
- Whisk one egg with 1 tablespoon of milk
- Use a pastry brush for even application
- Apply just before baking for maximum shine
Galette Folding Techniques
Proper folding is an art that keeps your filling secure and creates that rustic, beautiful appearance. When preparing your galette, leave about 2 inches of dough around the edges, then gently fold and pleat the dough over the filling. This technique not only looks impressive but helps contain the delicious rhubarb filling.
By following these tips, you’ll create a rhubarb galette with a professional-looking, golden-brown crust that’s sure to become a family favorite.
Serving and Storage Suggestions
When it comes to how to serve galette, I recommend enjoying this rustic rhubarb dessert slightly warm or at room temperature. The flavors really shine through when the pastry is still slightly crisp and the rhubarb filling maintains its vibrant texture.
For the ultimate rhubarb dessert pairings, I love topping my galette with a scoop of vanilla bean ice cream or a dollop of freshly whipped cream. The creamy accompaniment perfectly balances the tart rhubarb and buttery crust, creating a delightful contrast of temperatures and textures.
Storing rhubarb galette is simple. If you’re planning to enjoy it within a day, leave the galette covered at room temperature. For longer storage, wrap it carefully in plastic wrap and refrigerate for up to three days. To reheat, warm it gently in a 350°F oven for about 10 minutes to restore the crust’s crispy texture.
Pro tip: If you’ve made extra galettes, they freeze beautifully. Wrap the cooled galette tightly in plastic wrap and aluminum foil. When you’re ready to enjoy, thaw overnight in the refrigerator and reheat in the oven for a dessert that tastes freshly baked.